RedHat OpenShift is the new platform to be! If you want to be ready for the future, you have to be on Red Hat OpenShift Container Platform. But how can you play with OpenShift? First thing I find on the web is Minishift or OKD. But both are only updated to (OpenShift) 3.11 and at the time of writing, OpenShift 4.6 is released. And of course we want to play with the latest versions 🙂 Luckily Red Hat has given us more options.
To try RedHat OpenShift, you can go to openshift.com/try. Here you find 4 options.
1. On your computer
2. In your datacenter
3. In your public cloud
4. As-a-Service
The beste choice for me is 1 because a full installation of OpenShift requires a lot of resources which I do not have. I just want a minimal installation to test and play.
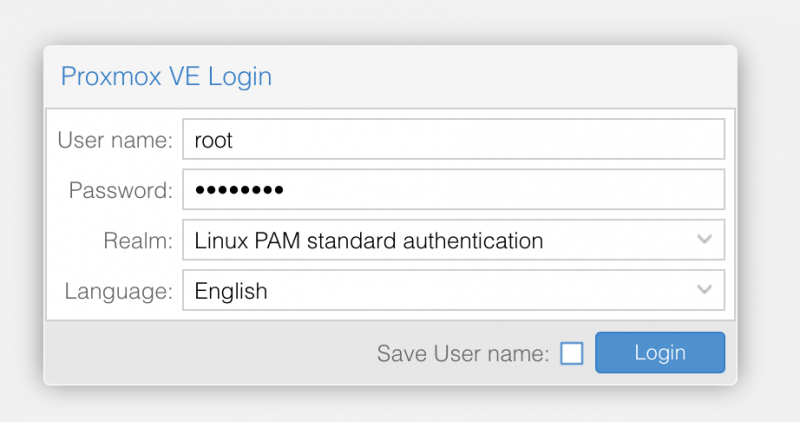
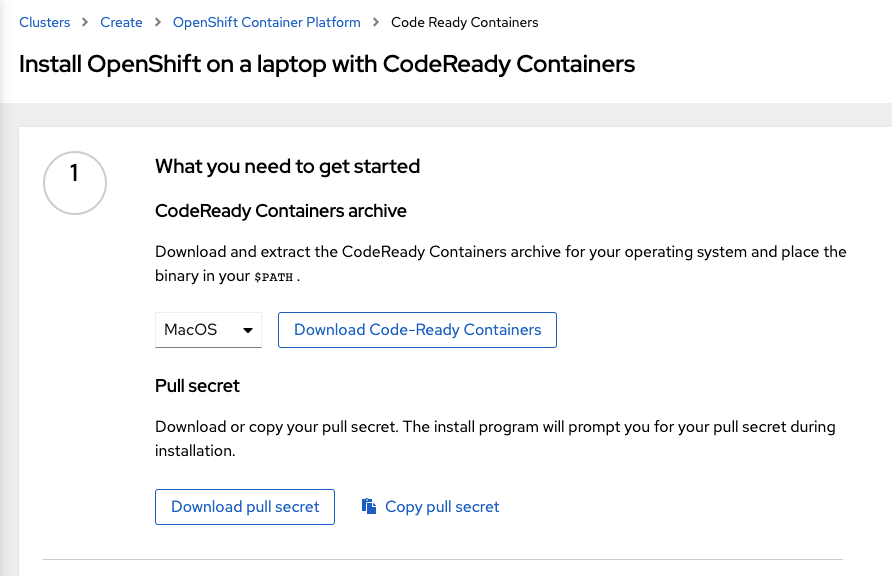
When you choose for On your computer, you have to login with your Red Hat account. If you don’t have one, you can create it directly.
On the Red Hat website you can download CodeReady Containers (CRC), which can bring a minimal OpenShift cluster up and running on your local laptop or pc. CRC OpenShift cluster is a single node which behaves as both a master and worker node. All machine-config and monitoring Operators are disabled. That why it is to play and test only.
How to install?
The hardware requirements for CRC are
– 4 vCPUs
– 9GB Memory
– 35GB Harddisk
As OS, you can choose for minimum Windows 10, MacOS Sierra or Linux RHEL\CentOS 7.5 or Fedora (last 2 versions).
In my case, I install it on my virtual server (running on Proxmox) where I choose CentOS 8.2. I installed CentOS with 4 vCPUs, 10GB Memory and 50GB of Harddisk (bye bye resources).
After CentOS is installed, you also need to install the Network Manager:# su -c 'yum install NetworkManager'
In my case, this was already installed during the basic setup.
Next is to download and install CRC. The link can be found on the RedHat website. Choose Linux and check the link. Download the files to the Linux server. Please notice that the file is about 2.5GB big. Depending on your internet speed, this can take a while.# wget https://mirror.openshift.com/pub/openshift-v4/clients/crc/latest/crc-linux-amd64.tar.xz
Unpack the downloaded file:# tar -xf crc-linux-amd64.tar.xz
Move the CRC file to a path directory or add the directory to the path file. I choose for the move. Check your path directories by running command# echo $PATH
I move the file to /usr/local/bin# sudo cp crc /usr/local/bin/
Check if the installation was successful by checking the installed version# crc versionCodeReady Containers version: 1.17.0+99f5c87
OpenShift version: 4.5.14 (embedded in binary)
Start the setup of CRC
This procedure will create the ~/.crc directory if it does not already exist.# crc setupINFO Checking if oc binary is cached
INFO Caching oc binary
INFO Checking if podman remote binary is cached
INFO Checking if goodhosts binary is cached
INFO Caching goodhosts binary
INFO Will use root access: change ownership of /home/bjbaarssen/.crc/bin/goodhosts
INFO Will use root access: set suid for /home/bjbaarssen/.crc/bin/goodhosts
INFO Checking if CRC bundle is cached in ‘$HOME/.crc’
INFO Unpacking bundle from the CRC binary
INFO Checking minimum RAM requirements
INFO Checking if running as non-root
INFO Checking if Virtualization is enabled
INFO Setting up virtualization
You need to enable virtualization in BIOS
By default, the settings in Proxmox for nested virtualization are disabled. Normally you are not virtualizing within your virtualization layer because it is much slower. At this point, I have not other solution, so I have to change my Proxmox settings.
Change Proxmox settings:
Source: https://pve.proxmox.com/wiki/Nested_Virtualization
Login into your Proxmox shell.
Check your virtualization settings:# cat /sys/module/kvm_intel/parameters/nested
output is N
Change the virtualization settings to Y
# echo “options kvm-intel nested=Y” > /etc/modprobe.d/kvm-intel.conf
This setting will be activated after your restart of the service.
Because lots of other virtual servers are running on Proxmox, I have to shutdown all my servers. The service can not be restarted when it is in use.
After you shutdown all the servers, restart the service:
# modprobe -r kvm_intel
# modprobe kvm_intel
Check if the new setting is active:
# cat /sys/module/kvm_intel/parameters/nested
output is Y
Also for the CentOS, the hosts settings in Proxmox need to be changed.
Go to the CentOS settings, Hardware – Processors (or CPU) and change to TYPE to HOST.
See printscreen:

Start VM(s)
Start the setup of CRC (second try)# crc setup
INFO Checking if oc binary is cached
INFO Checking if podman remote binary is cached
INFO Checking if goodhosts binary is cached
INFO Checking if CRC bundle is cached in ‘$HOME/.crc’
INFO Checking minimum RAM requirements
INFO Checking if running as non-root
INFO Checking if Virtualization is enabled
INFO Checking if KVM is enabled
INFO Checking if libvirt is installed
INFO Installing libvirt service and dependencies
INFO Will use root access: install virtualization related packages
[sudo] wachtwoord voor bjbaarssen:
INFO Checking if user is part of libvirt group
INFO Adding user to libvirt group
INFO Will use root access: add user to libvirt group
INFO Checking if libvirt daemon is running
INFO Checking if a supported libvirt version is installed
INFO Checking if crc-driver-libvirt is installed
INFO Installing crc-driver-libvirt
INFO Checking for obsolete crc-driver-libvirt
INFO Checking if libvirt ‘crc’ network is available
INFO Setting up libvirt ‘crc’ network
INFO Checking if libvirt ‘crc’ network is active
INFO Starting libvirt ‘crc’ network
INFO Checking if NetworkManager is installed
INFO Checking if NetworkManager service is running
INFO Checking if /etc/NetworkManager/conf.d/crc-nm-dnsmasq.conf exists
INFO Writing Network Manager config for crc
INFO Will use root access: write NetworkManager config in /etc/NetworkManager/conf.d/crc-nm-dnsmasq.conf
INFO Will use root access: Changing permission for /etc/NetworkManager/conf.d/crc-nm-dnsmasq.conf to 420
INFO Will use root access: executing systemctl daemon-reload command
INFO Will use root access: executing systemctl reload NetworkManager
INFO Checking if /etc/NetworkManager/dnsmasq.d/crc.conf exists
INFO Writing dnsmasq config for crc
INFO Will use root access: write dnsmasq configuration in /etc/NetworkManager/dnsmasq.d/crc.conf
INFO Will use root access: Changing permission for /etc/NetworkManager/dnsmasq.d/crc.conf to 420
INFO Will use root access: executing systemctl daemon-reload command
INFO Will use root access: executing systemctl reload NetworkManager
Setup is complete, you can now run ‘crc start’ to start the OpenShift cluster
Start the OpenShift cluster# crc startINFO Checking if oc binary is cached
INFO Checking if podman remote binary is cached
INFO Checking if goodhosts binary is cached
INFO Checking minimum RAM requirements
INFO Checking if running as non-root
INFO Checking if Virtualization is enabled
INFO Checking if KVM is enabled
INFO Checking if libvirt is installed
INFO Checking if user is part of libvirt group
INFO Checking if libvirt daemon is running
INFO Checking if a supported libvirt version is installed
INFO Checking if crc-driver-libvirt is installed
INFO Checking if libvirt ‘crc’ network is available
INFO Checking if libvirt ‘crc’ network is active
INFO Checking if NetworkManager is installed
INFO Checking if NetworkManager service is running
INFO Checking if /etc/NetworkManager/conf.d/crc-nm-dnsmasq.conf exists
INFO Checking if /etc/NetworkManager/dnsmasq.d/crc.conf exists
? Image pull secret [? for help]
Copy the pull secret from your Red Hat account (see printscreen) and paste on the CLI and press Enter
INFO Extracting bundle: crc_libvirt_4.5.14.crcbundle … crc.qcow2: 9.97 GiB [—] 100.00%
INFO Checking size of the disk image /home/bjbaarssen/.crc/cache/crc_libvirt_4.5.14/…
INFO Creating CodeReady Containers VM for OpenShift 4.5.14…
INFO CodeReady Containers VM is running
INFO Generating new SSH Key pair …
INFO Copying kubeconfig file to instance dir …
INFO Starting network time synchronization in CodeReady Containers VM
INFO Verifying validity of the cluster certificates …
INFO Check internal and public DNS query …
INFO Check DNS query from host …
INFO Starting OpenShift kubelet service
INFO Configuring cluster for first start
INFO Adding user’s pull secret …
INFO Updating cluster ID …
INFO Starting OpenShift cluster
INFO Updating kubeconfig
WARN The cluster might report a degraded or error state. This is expected since several operators have been disabled to lower the resource usage. For more information, please consult the documentation Started the OpenShift cluster.
To access the cluster, first set up your environment by following ‘crc oc-env’ instructions.Then you can access it by running ‘oc login -u developer -p developer https://api.crc.testing:6443’.
To login as an admin, run ‘oc login -u kubeadmin -p dpDFV-xamBW-kKAk3-Fi6Lg https://api.crc.testing:6443’.***
To access the cluster, first set up your environment by following ‘crc oc-env’ instructions.
Check the status of your CRC Cluster# crc statusCRC VM: Running
OpenShift: Running (v4.5.14)
Disk Usage: 13.8GB of 32.72GB (Inside the CRC VM)
Cache Usage: 13.04GB
Cache Directory: /home/bjbaarssen/.crc/cache
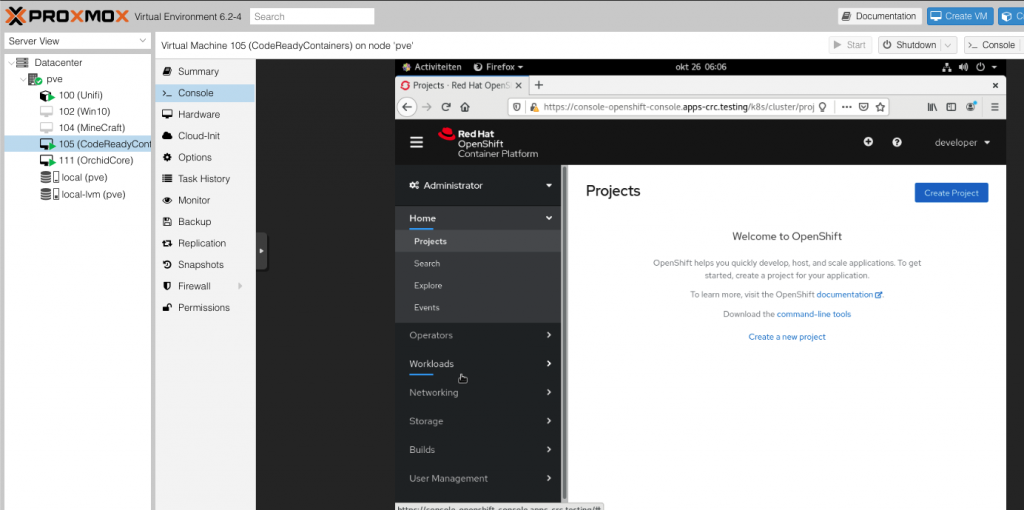
To open the OpenShift webconsole, run the command# crc console
This will open your default webbrowser and start the OpenShift Web Console.
If something is going wrong, you get this error:
Opening the OpenShift Web Console in the default browser…[bjbaarssen@192 ~]$ Error: no DISPLAY environment variable specified
You can also request the URL also by# crc console --url
https://console-openshift-console.apps-crc.testing
If you forgot the login credentials, you can run# crc console --credentialsTo login as a regular user, run ‘oc login -u developer -p developer https://api.crc.testing:6443’.
To login as an admin, run ‘oc login -u kubeadmin -p dpDFV-xamBW-kKAk3-Fi6Lg https://api.crc.testing:6443’
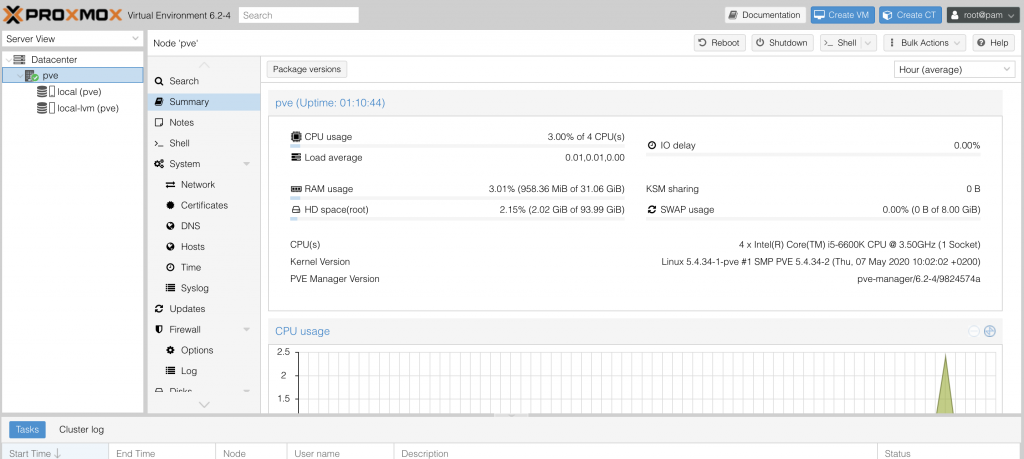
When you successfully run the command and logged into the Web Console, you can start with your first project. See printscreen.
From this point we can open the OpenShift Web Console only on the Virtual Linux machine, but I want to open it on all my machines in my network. Let’s see how we can do that.
Setting up CodeReady Containers on a remote server
Be sure the cluster is running, check with # crc status
if down/stopped, run# crc start
Install the haproxy package and other utilities# sudo dnf install haproxy policycoreutils-python-utils jq
Modify the firewall to allow communication with the cluster:# sudo systemctl start firewalld
# sudo firewall-cmd --add-port=80/tcp --permanent
# sudo firewall-cmd --add-port=6443/tcp --permanent
# sudo firewall-cmd --add-port=443/tcp --permanent
# sudo systemctl restart firewalld
For SELinux, allow listening to TCP port 6443# sudo semanage port -a -t http_port_t -p tcp 6443
Create a backup of the default haproxy configuration in case you messed it up: # sudo cp /etc/haproxy/haproxy.cfg{,.bak}
Configure haproxy for use with the cluster:# export CRC_IP=$(crc ip)
# sudo nano /etc/haproxy/haproxy.cfg
Add the following to the cfg file:global
debug
defaults
log global
mode http
timeout connect 5000
timeout client 5000
timeout server 5000
frontend apps
bind 0.0.0.0:80
bind 0.0.0.0:443
option tcplog
mode tcp
default_backend apps
backend apps
mode tcp
balance roundrobin
option ssl-hello-chk
server webserver1 $CRC_IP:443 check
frontend api
bind 0.0.0.0:6443
option tcplog
mode tcp
default_backend api
backend api
mode tcp
balance roundrobin
option ssl-hello-chk
server webserver1 $CRC_IP:6443 check
Start the haproxy service:# sudo systemctl start haproxy
To open the OpenShift Web Console on your local clients in your network, add the following to their local hosts file. In my case, 192.168.1.64 is the ip address of the server where CRC is running.# sudo nano /etc/hosts
Add the following to the hosts file192.168.1.64 api.crc.testing oauth-openshift.apps-crc.testing console-openshift-console.apps-crc.testing default-route-openshift-image-registry.apps-crc.testing
Open a webbrowser on you client and go to
https://console-openshift-console.apps-crc.testing

You probably don’t see any new blog online soon, because I am playing in Red Hat OpenShift Container Platform 🙂
Because this will eat a lot of your resources, you can easily temporally shutdown your CRC cluster and start it when you need it. See below the most common commands.# crc stop
# crc status
# crc start
# crc console